Introduction
Merging branches in Git is a fundamental aspect of collaborative software development. It enables multiple developers to work on unique features or fixes simultaneously without interfering with each other's work. However, integrating these changes can sometimes lead to conflicts, especially when the same parts of the code are modified. In this guide, we will walk you through the process of merging another branch into your branch, resolving conflicts, and ensuring that your branch is up to date with the latest changes from dev. In this article you will learn how to push these changes to your remote repository and use Git tools to visualize and manage your repository effectively.
Create a github account
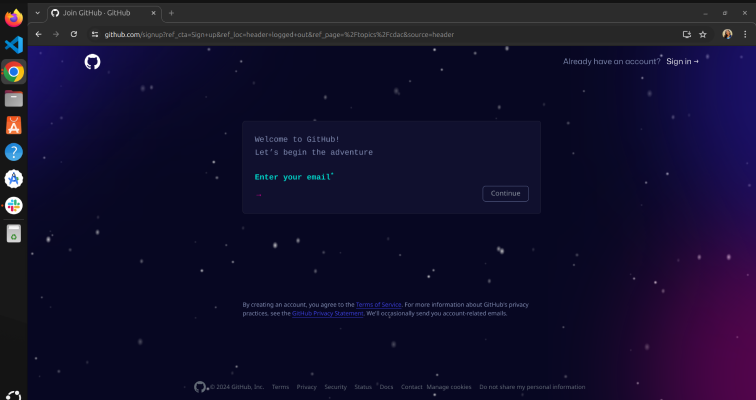
- Open GitHub and click "Sign Up."
- Enter your username, email address, and password.
- Complete the signup process.
- Confirm your email address to activate your account.
Creating Your First Repository
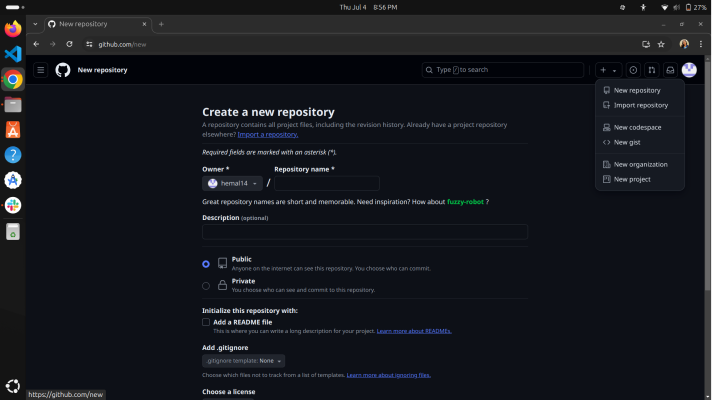
- Log into your GitHub account.
- Click the "+" sign in the upper right corner and select "New repository."
- Name the repository and add a description (optional). 4.
- Choose the repository's visibility (public or private). 5.
- Initialize it with a README file (optional).
Clone the Repository
- Go to the repository you want to clone on GitHub.
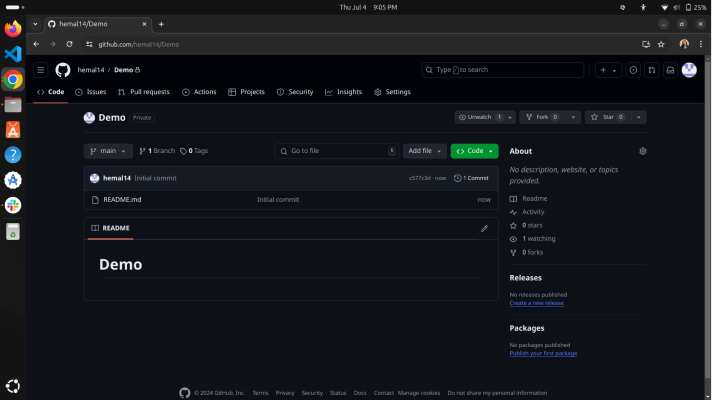
- Click "Code" and copy the HTTPS or SSH URL.
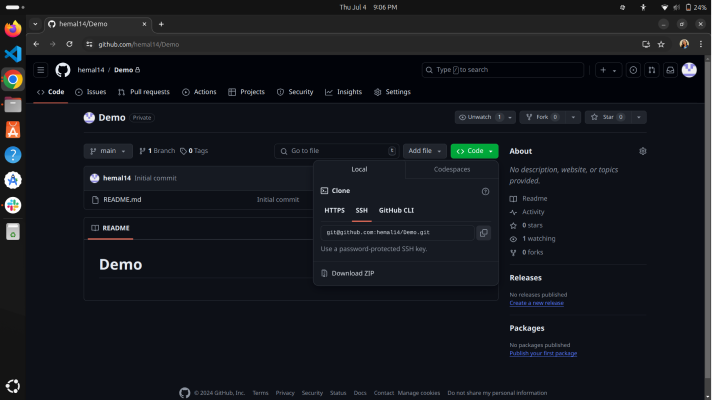
- Open a terminal where you want to clone the repository. And use git clone followed by the copied URL to clone the repository to your local machine.
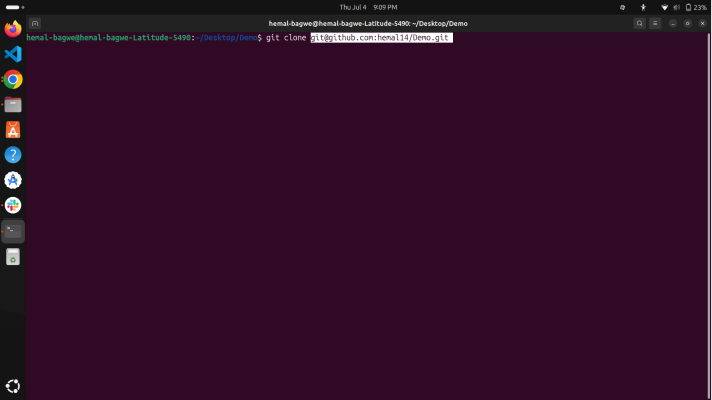
- Navigate to Cloned Repository:
- Open your terminal (command prompt) and navigate to the directory where you cloned the repository. You can use the cd command to change directories.
- cd path to your cloned repository 3.
- Command to open in Visual Studio - code .
Visual Studio Code Interface
Visual Studio Code will launch with the files and folders of your repository loaded in the sidebar, and for this very first time you will be on the main branch. 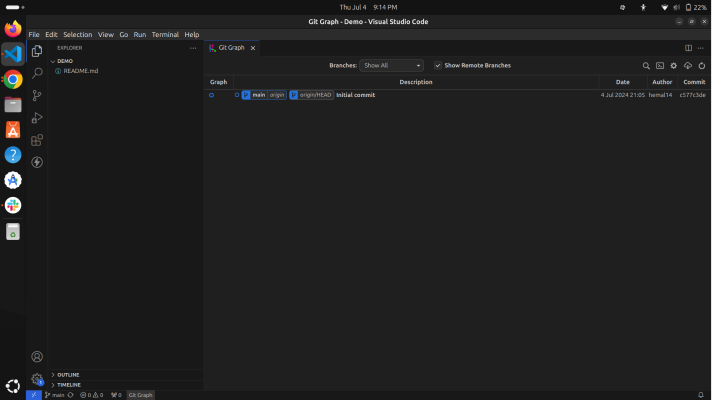
Create a new branch
To create a new branch (First -branch) from the main branch using GitHub's interface, here are the steps :
- Switch to Main Branch :
- Ensure you are on the main branch. If not, click on the branch drop-down menu and select main.
- Create a New Branch :
- Click on the branch main which is on the bottom left. You should see a prompt to create a new branch from main.
- Once you have typed the new branch name (First-branch), press Enter or click on the "Create branch: First-branch from 'main'" option that appears.
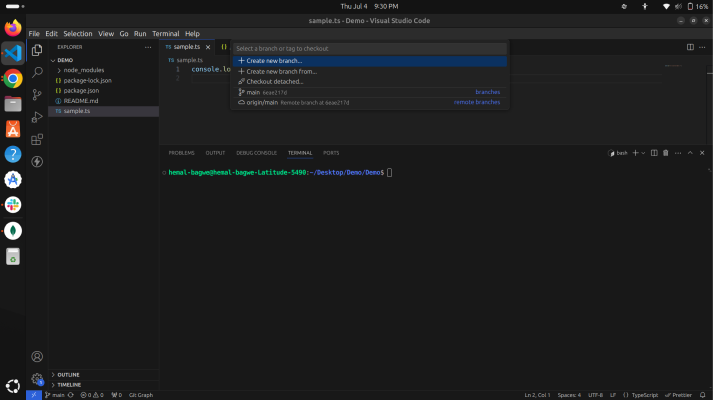
- Verify Creation
- GitHub will create the new branch for you based on main. You can verify this by checking the branch drop-down menu again, where you should see your newly created branch listed.
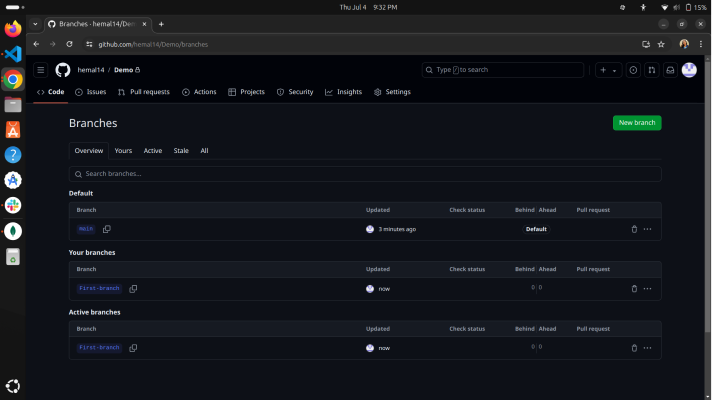
2. This process allows you to create a new branch (First-branch) from the main branch directly on GitHub's web interface.
Publish your branch to GitHub
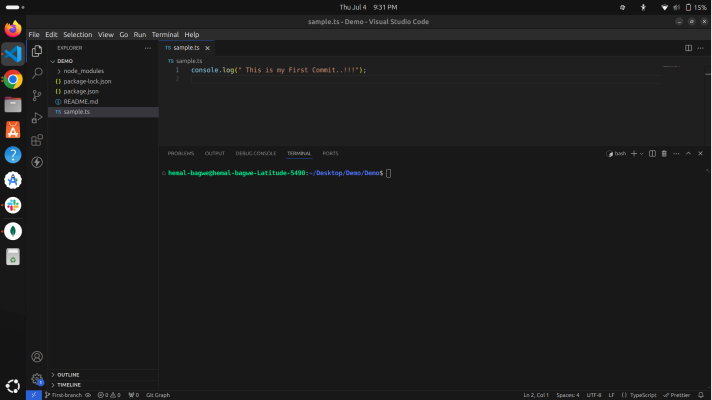 git push --set-upstream origin <branch-name>
or
At the bottom left corner where your new branch name is present, there's an arrow icon (up and down arrows in a circle). This icon represents synchronization. By clicking on that button , your branch to publish to git Hub repository.
Ensure Changes are Committed
Suppose you have created a project and made changes to files. Before pushing to GitHub, make sure you have committed your changes locally using Git.
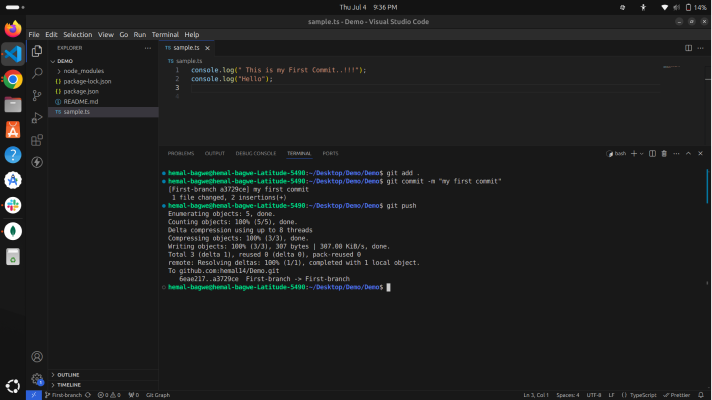
- git add .
stages all changes in the current directory and its sub directories for the next commit.
- git commit -m "Your commit message"
creates a commit with a specified message describing the changes made since the last commit.
- git push
uploads local repository content to a remote repository (GitHub)
- Verify on GitHub
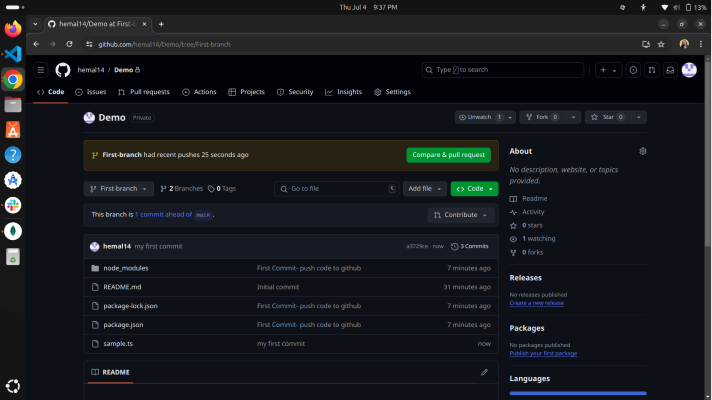
- Once pushed, go to your repository on GitHub in a web browser.
- You should see your newly pushed branch (First-branch) listed in the branch drop-down menu or under the "Branches" tab.
Viewing Git Graph (Commit History)
- Open Git Graph
.png)
- After committing changes and pushing them to your branch, you can open the Git Graph or commit history graph in your Git client (like GitHub Desktop, or even in Visual Studio Code with appropriate extensions).
- Understanding the Graph:
- The Git graph visually represents the history of commits and branches in your repository.
- Each commit is represented as a node (circle) in the graph.
- Branches are shown as lines branching off from a commit node.
- Merges are represented where branches come together.
- Tags or labels may also be visible depending on your Git client settings.
- Analyzing Changes:
- You can use the Git graph to trace the development of your project, understand when and where changes were made, and visualize the relationships between different branches and commits.
- It helps in debugging, reviewing code history, and collaborating with others by providing a clear view of how your project has evolved.
Benefits of Creating Pull Requests (PRs)
- Code Review
- Purpose: Before merging changes into the main branch (main or master), a pull request allows team members to review the proposed changes.
- Benefits: Reviewers can provide feedback, suggest improvements, and ensure code quality and standards are maintained.
- How to Create a Pull Request on GitHub:
- Navigate to Your Repository:
- Go to your repository on GitHub where you pushed your branch (First-branch).
- Compare and Create Pull Request:
- Click on the "Pull requests" tab at the top of the repository.
- Click on the green "New pull request" button.
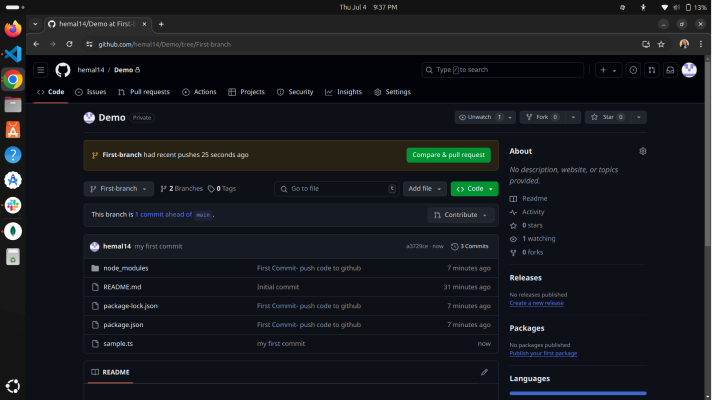
- Select Branches:
- Choose the branch you want to compare and create PR (often main or master or dev)
- Select your branch (First-branch) as the compare branch.
- Create Pull Request:
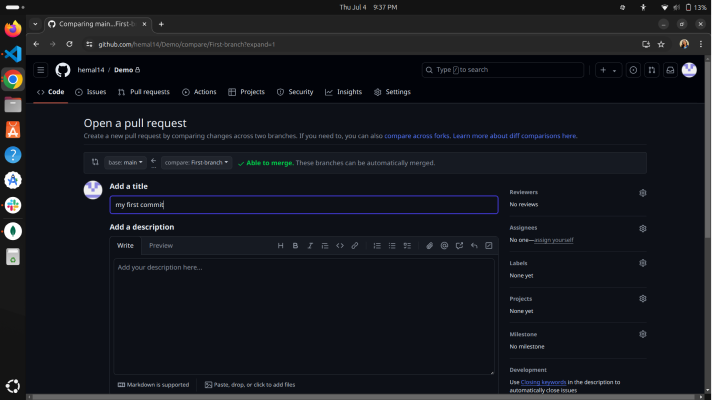
- Add a title and description to describe the changes made in your branch.
- Click on the "Create pull request" button to create the pull request.
- Review and Merge:
- Once created, the PR will show a summary of changes, discussions, and checks (if any).
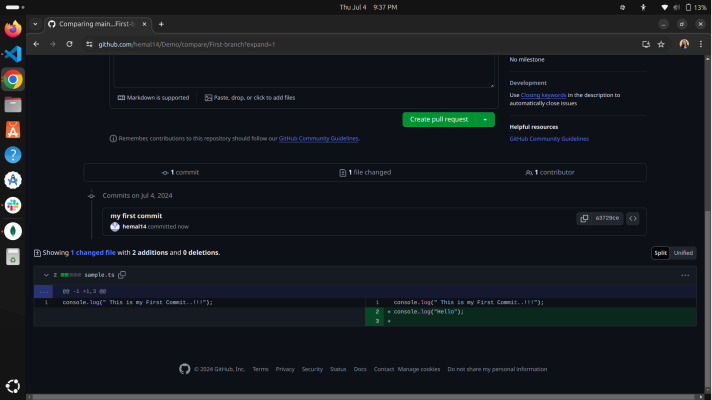
- Reviewers can add comments, approve the changes, or request further modifications.
- When ready, merge the pull request into the base branch (main) using the "Merge pull request" button.
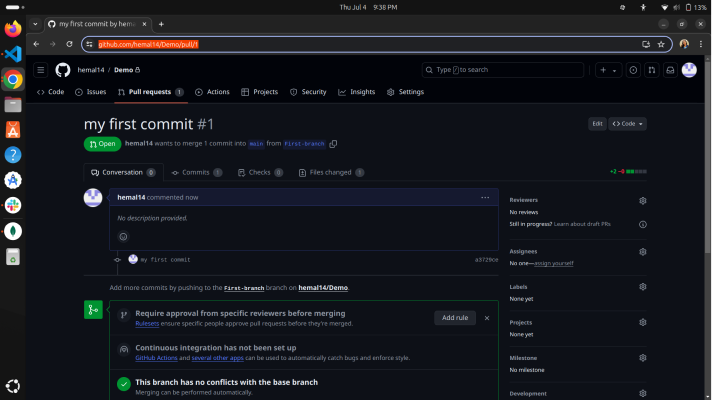
Merging dev Branch into your branch with Conflict Resolution ) :
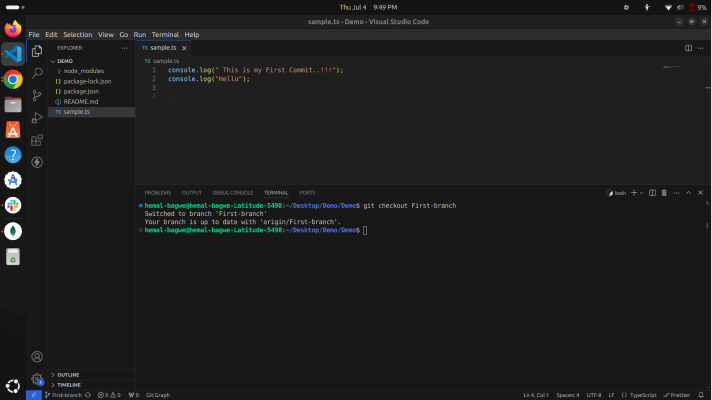
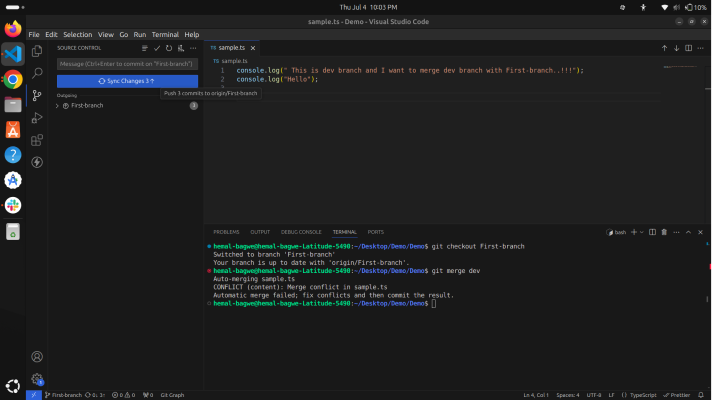
- First, switch to your branch (First -branch) where you want to merge changes from another branch
- Checkout your branch ( First-branch ) :
git checkout First-branch
- Merge Branches:
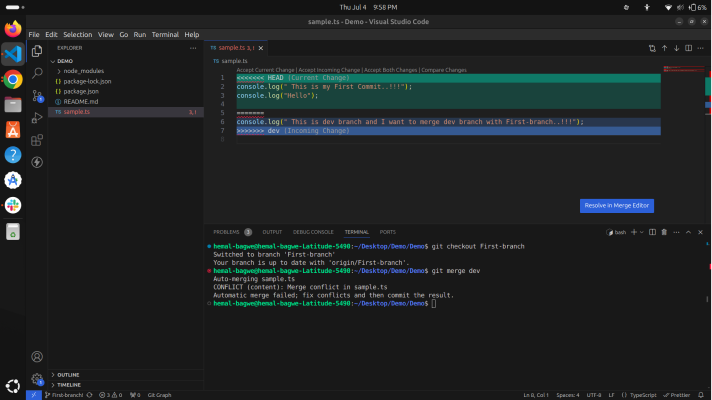
- Merge the dev branch into your current branch (First-branch). This may cause conflicts if changes overlap.
git merge dev
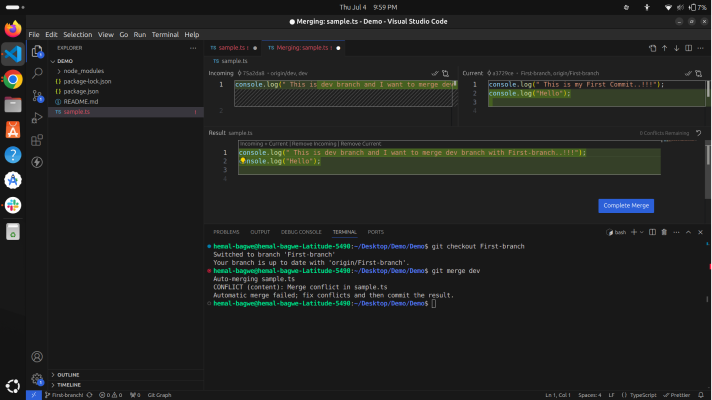
- Resolve Conflicts:
- Git will indicate where conflicts occur in your files. Open each conflicted file in your code editor.
- Commit the Merge:
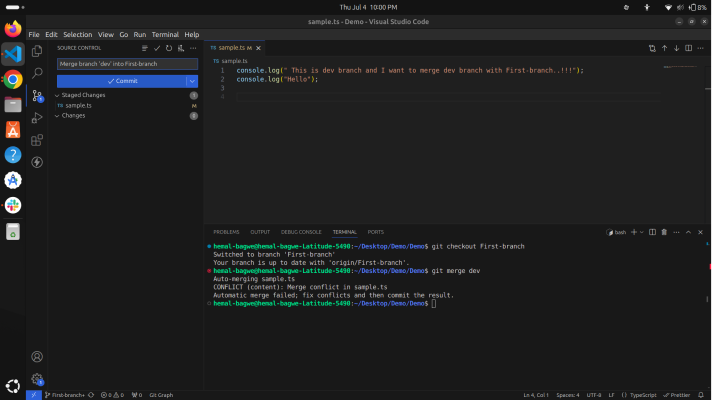
- After resolving conflicts, you can use
- git commit -m "Merge branch dev into First-branch" add a merge commit message directly.
- Sync and Update:
- After pushing, your branch (First-branch) is now synchronised with dev and up to date
.png)
git pull
- Fetch:
- First, Git fetches the latest changes from the dev branch on the remote repository (origin). This command updates your local repository with any new commits from dev without merging them into your current branch immediately.
- Merge:
- After fetching, Git automatically merges the fetched changes from origin/dev into your current local branch.
git pull origin dev
Conclusion
By following these steps, you can effectively merge changes from another branch into your branch, handle any conflicts that arise, and ensure that your branch is synchronized with the latest updates. Utilizing commands like git pull, git add, git commit, and git push, along with tools like the Git Graph, enhances your ability to manage code changes and collaborate with your team. This structured approach not only maintains code quality and stability but also fosters a collaborative and efficient development environment. Remember, using pull requests (PRs) for merging changes provides additional benefits by facilitating code review and automated testing, further enhancing your project's robustness.
