


How to build a Chating app with ReactJS


Building a chat application has become a popular project for developers because it involves creating a real-time communication platform that is both interactive and functional.
With ReactJS, you can create a modern, efficient, and responsive chat app with ease.
React’s component-based architecture makes it simple to design dynamic user interfaces, while tools like Firebase or WebSockets enable seamless real-time messaging.
In this article, we’ll guide you through the process of creating a chat application step by step.
Whether you're a beginner or an experienced developer, this guide will help you understand the key concepts and technologies needed to build a fully functional chat app with ReactJS.
Let’s get started!
Setup Your React Environment
To build a chat application with ReactJS, the first step is setting up your development environment. React provides a strong foundation for creating dynamic and interactive user interfaces, and getting started is straightforward.
Begin by installing Node.js and npm (Node Package Manager) on your system if you haven’t already. These tools are essential for managing your project dependencies and running your development server.
Next, create a new React project using the following command:
npx create-react-app chat-appThis command generates a React project with all the necessary configuration, so you don’t need to set it up manually. Once the setup is complete, navigate to the project directory:
cd chat-appStart the development server to see your app running:
npm start
After setting up the basic React environment, you can install additional libraries that will be used in your chat application. For instance:
- React Router for managing navigation between pages (like login and chat room views).
- Axios for handling API calls.
- Socket.IO client or Firebase for real-time communication.
This initial setup lays the groundwork for your chat app, ensuring a smooth development process. With your React environment ready, you can now focus on designing the user interface and integrating real-time features.
npm i socket.io-client web-vitalsChoose a Backend Technology
To enable real-time communication in your chat application, you need a reliable backend technology that supports features like real-time data updates and persistent connections.
For this project, we will use Socket.IO, a powerful library that simplifies real-time, bi-directional communication between the server and the client.
Why Socket.IO?
- Real-time Communication: Socket.IO uses WebSockets under the hood, enabling instant message delivery with minimal latency.
- Cross-platform Support: It works seamlessly across different browsers and platforms.
- Event-based Architecture: Makes it easy to handle specific actions like sending and receiving messages or notifications.
- Automatic Fallback: If WebSockets are not supported, it falls back to other communication protocols, ensuring reliability.
Setting Up the Backend with Socket.IO
Initialize a Node.js Project Start by creating a new folder for your backend and initializing a Node.js project:
mkdir chat-backend
cd chat-backend
npm init -y
2. Install Required Dependencies Install Express for setting up a server and Socket.IO for real-time communication:
npm install express socket.io cors3. Create the Server
Create a file named server.js and set up a basic Express server with Socket.IO:
const express = require('express');
const http = require('http');
const { Server } = require('socket.io');
const cors = require('cors');

const app = express();
app.use(cors()); // Enable CORS

const server = http.createServer(app);
const io = new Server(server, {
    cors: {
        origin: "http://localhost:3000",
        methods: ["GET", "POST"],
       },
});

io.on('connection', (socket) => {
     socket.on('chatMessage', (msg) => {
        console.log('Message received:', msg);
        io.emit('chatMessage', msg);
    });
    socket.on('disconnect', () => {
        console.log('A user disconnected');
    });
});

server.listen(8080, () => {
    console.log('Server is running on http://localhost:8080');
});
4. Test the Backend Start the server:
node server.js
Open the browser and navigate to http://localhost:3000. The server is now ready to handle real-time events.
Create the User Interface
Before we start creating the user interface for our chat application, it’s important to choose a CSS framework for styling. We’ll primarily use Tailwind CSS in this guide because of its flexibility and utility-first approach. However, if you prefer Bootstrap for its pre-designed components, you can easily set it up and follow along.
Choosing a CSS Framework
- Tailwind CSS: A utility-first CSS framework that offers complete control over the design, allowing you to create custom layouts and styles with ease.
- Bootstrap: A popular CSS framework with pre-styled components like buttons, cards, and modals, making it quick to design UI.
In this article, we’ll use Tailwind CSS to design our chat application. If you wish to use Bootstrap, here’s how to set it up:
How to Set Up Bootstrap
Install Bootstrap
npm install bootstrap react-bootstrap2. Import Bootstrap
Add the following line to your src/index.js file:
import 'bootstrap/dist/css/bootstrap.min.css';3. Optional: Use Bootstrap Icons Install Bootstrap Icons:
npm install bootstrap-iconsImport them in your component:
import 'bootstrap-icons/font/bootstrap-icons.css';Once Bootstrap is set up, you can use pre-styled components in your project. For example:
<button className="btn btn-primary">Bootstrap Button</button>Creating the Chat UI with Tailwind CSS
How to Set Up Tailwind
1. Install Tailwind CSS:
npm install -D tailwindcss postcss autoprefixer
npx tailwindcss init
2. Configure tailwind.config.js:Ensure the content property includes your project files:
module.exports = {
  content: [
      "./src/**/*.{js,jsx,ts,tsx}",
  ],
  theme: {
      extend: {},
  },
  plugins: [],
};
3. Add Tailwind CSS directives to your CSS file (e.g., src/index.css):
@tailwind base;
@tailwind components;
@tailwind utilities;
4. Import the CSS file in your src/index.js or src/main.js:
import './index.css';Now that we’ve chosen Tailwind CSS, let’s build the user interface step by step.
Components of the Chat UI
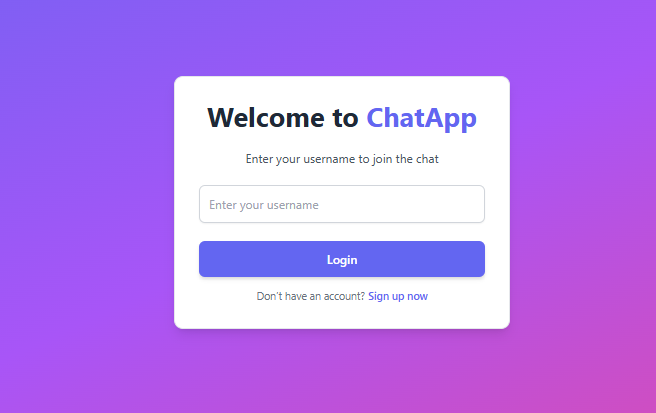
- Login/Signup Screen: For user authentication.
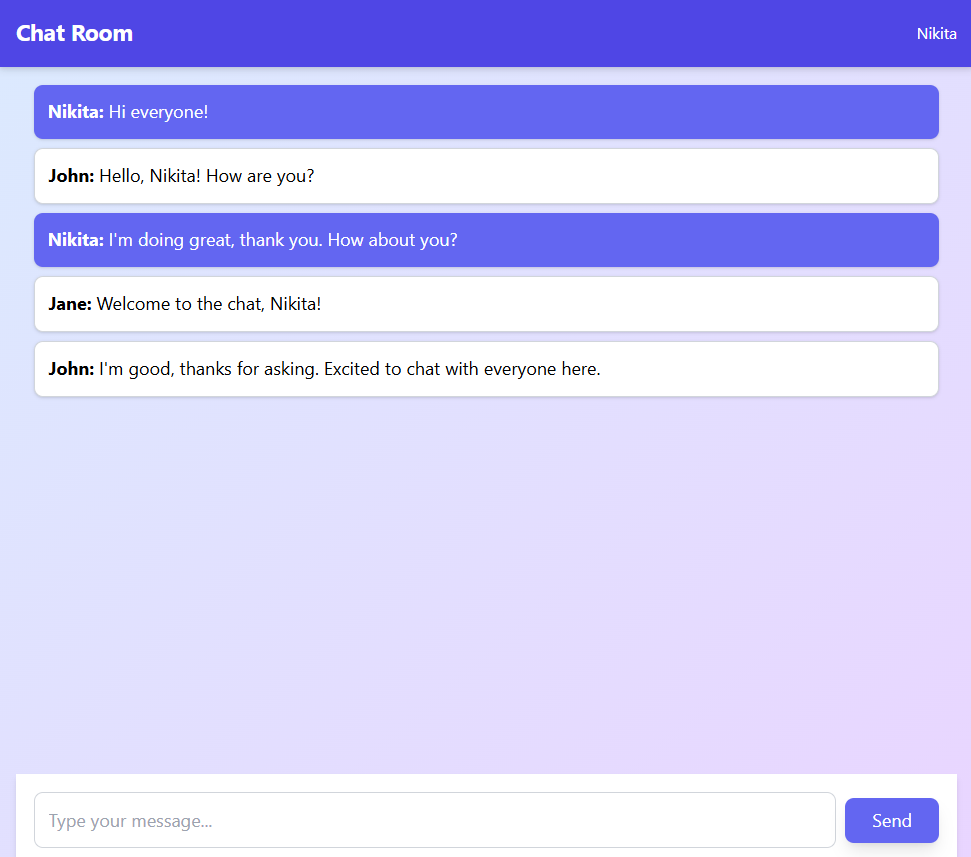
- Chat Room Layout: Displays messages and input for sending new messages.
Building the UI
Login Component
// src/components/Login.js
import React from 'react';

const Login = ({ onLogin }) => {
    const [username, setUsername] = React.useState('');

    return (
        <div className="flex items-center justify-center min-h-screen bg-gradient-to-br from-indigo-500 via-purple-500 to-pink-500">
            <div className="bg-white p-8 rounded-xl shadow-lg w-full max-w-md border border-gray-200">
                <h2 className="text-4xl font-bold mb-6 text-center text-gray-800">
                    Welcome to <span className="text-indigo-500">ChatApp</span>
                </h2>
                <p className="text-center text-gray-600 mb-6">
                    Enter your username to join the chat
                </p>
                <input
                    type="text"
                    className="border border-gray-300 focus:border-indigo-500 focus:ring focus:ring-indigo-300 rounded-lg p-3 w-full mb-6 text-gray-700 shadow-sm"
                    placeholder="Enter your username"
                    value={username}
                    onChange={(e) => setUsername(e.target.value)}
                />
                <button
                    onClick={() => username.trim() && onLogin(username)}
                    className="bg-indigo-500 text-white font-semibold px-6 py-3 rounded-lg w-full hover:bg-indigo-600 shadow-md transition duration-300"
                >
                    Login
                </button>
                <p className="mt-4 text-center text-sm text-gray-500">
                    Don’t have an account? <span className="text-indigo-500 font-medium">Sign up now</span>
                </p>
            </div>
        </div>
    );
};

export default Login;
Chat Room Component
import React, { useEffect } from "react";

// src/components/ChatRoom.js
const ChatRoom = ({ username, socket }) => {
    const [messages, setMessages] = React.useState([]);
    const [newMessage, setNewMessage] = React.useState('');

    const sendMessage = () => {
        if (newMessage.trim()) {
            socket.emit('chatMessage', { user: username, text: newMessage });
            setNewMessage('');
        }
    };

    useEffect(() => {
        socket.on('chatMessage', (message) => {
            console.log(`User connected: ${socket.id}`);
            setMessages((prev) => [...prev, message]);
        });

        return () => {
            socket.off('chatMessage');
        };
    }, [socket]);

    return (
        <div className="flex flex-col h-screen bg-gradient-to-br from-blue-100 to-purple-200">
            {/* Header */}
            <div className="bg-indigo-600 text-white p-4 flex items-center justify-between shadow-md">
                <h1 className="text-xl font-bold">Chat Room</h1>
                <span className="text-sm">{username}</span>
            </div>

            {/* Messages Section */}
            <div className="flex-1 overflow-y-auto p-4">
                {messages.length === 0 ? (
                    <div className="text-center text-gray-500 mt-10">
                        No messages yet. Start the conversation!
                    </div>
                ) : (
                    messages.map((msg, index) => (
                        <div
                            key={index}
                            className={`mb-2 p-3 rounded-lg shadow ${
                                msg.user === username
                                    ? "bg-indigo-500 text-white self-end"
                                    : "bg-white border border-gray-300"
                            }`}
                        >
                            <strong>{msg.user}:</strong> {msg.text}
                        </div>
                    ))
                )}
            </div>

            {/* Input Section */}
            <div className="flex items-center p-4 bg-white shadow-md">
                <input
                    type="text"
                    className="flex-1 border border-gray-300 rounded-lg p-3 mr-2 focus:outline-none focus:ring focus:ring-indigo-200"
                    placeholder="Type your message..."
                    value={newMessage}
                    onChange={(e) => setNewMessage(e.target.value)}
                />
                <button
                    onClick={sendMessage}
                    className="bg-indigo-500 text-white px-6 py-2 rounded-lg hover:bg-indigo-600 shadow-lg transition duration-200"
                >
                    Send
                </button>
            </div>
        </div>
    );
};

export default ChatRoom;
App Component
// src/App.js
import React from 'react';
import io from 'socket.io-client';
import Login from './components/Login';
import ChatRoom from './components/ChatRoom';

const socket = io.connect('http://localhost:8080/');

const App = () => {
    const [username, setUsername] = React.useState('');

    return (
        <div>
            {!username ? (
                <Login onLogin={setUsername} />
            ) : (
                <ChatRoom username={username} socket={socket} />
            )}
        </div>
    );
};

export default App;
Wrapping Up
Building a chat application with ReactJS is an excellent way to enhance your development skills, especially in real-time communication and frontend-backend integration. Through this project, you’ve learned how to:
- Set up a React application and design an interactive user interface using Tailwind CSS.
- Build a backend server with Socket.IO for real-time messaging.
- Integrate the frontend with the backend to enable seamless communication.
- Handle state management in React and debug common issues.
You can take this project further by adding features like user authentication, private chat rooms, or file sharing. Deploying your app to a live environment will give you valuable experience with hosting and configuration.
By completing this project, you’ve not only built a functional chat app but also gained practical knowledge of ReactJS and WebSocket-based communication. Keep experimenting, and happy coding!
 WhatsApp
 Call Us
 Mail Us