


Full Guide, Tips & Demos on How to use React with Tailwind


React and Tailwind CSS together create a perfect combination for modern web development. React simplifies building interactive user interfaces, while Tailwind CSS makes styling faster and more consistent with its utility-first approach. This guide is designed to make it easy for you to understand and use React with Tailwind CSS effectively.
Why Use React with Tailwind CSS?
- No Need for Custom CSS: Tailwind provides pre-designed utility classes, so you can build layouts without writing much custom CSS.
- Consistent Design: Utility classes ensure a consistent style across your app.
- Speed: React’s component-based structure, combined with Tailwind’s CSS utilities, makes development lightning fast.
- Responsive by Default: Tailwind includes built-in responsive design tools.
Example:
In React, you can style a button with Tailwind like this:
<button className="bg-blue-500 text-white px-4 py-2 rounded hover:bg-blue-600">
  Click Me
</button>;
This small class string includes the color, padding, border radius, and hover effect—all in one go!
Tailwind CSS vs. Bootstrap: Why Choose Tailwind?
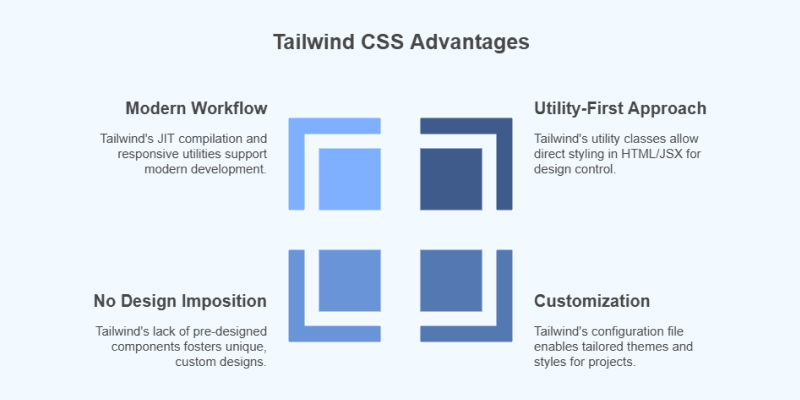
1. Utility-First Approach
Tailwind CSS offers utility classes that let you style components directly in your HTML or JSX, giving you full control over the design without relying on predefined components. Bootstrap, on the other hand, focuses on component-based styling, which can sometimes limit flexibility.
2. Customization
Tailwind is highly customizable through its configuration file, allowing you to define themes, colors, and spacing that align with your project’s needs. Bootstrap customization often involves overriding existing styles, which can be cumbersome.
3. No Design Imposition
With Tailwind, there are no pre-designed components, so you're free to create unique, custom designs. Bootstrap comes with pre-styled components that may lead to a “Bootstrap look” if not heavily customized.
4. Modern Development Workflow
Tailwind supports features like JIT (Just-In-Time) compilation and responsive utilities, ensuring optimized builds and flexibility. Bootstrap is more traditional, focusing on a grid system and component hierarchy.
Why Developers Prefer Tailwind Over Bootstrap?
If you want full design freedom, better performance, and a workflow tailored to modern frameworks like React, Tailwind is often the better choice. For quick prototyping with ready-to-use components, Bootstrap might still be useful.
How to Set Up React with Tailwind CSS
Here’s a step-by-step guide to get Tailwind CSS working with React.
Step 1: Create a React App
npx create-react-app my-app
cd my-app
Step 2: Install Tailwind CSS
Install Tailwind CSS and its required dependencies:
npm install -D tailwindcss postcss autoprefixer
npx tailwindcss init
Step 3: Configure Tailwind
Open the tailwind.config.js file and specify where Tailwind should look for files:
module.exports = {
  content: ["./src/**/*.{js,jsx,ts,tsx}"],
  theme: {
    extend: {},
  },
  plugins: [],
};
Step 4: Import Tailwind into CSS
Replace the contents of src/index.css with the following:
@tailwind base;
@tailwind components;
@tailwind utilities;
Step 5: Start Your App
Run the app:
npm startThat’s it! Your React app is now integrated with Tailwind CSS.
Best Practices, Tricks, and Tips for Tailwind in React
Tip 1: Break Long Class Strings
For better readability, split long class strings into multiple lines:
<div
  className="
    flex
    justify-center
    items-center
    h-screen
    bg-gradient-to-r
    from-blue-500
    to-purple-500
  "
>
  <h1 className="text-4xl text-white">Hello, Tailwind!</h1>
</div>;
Tip 2: Use Conditional Class Names
When applying classes dynamically, use libraries like clsx or classnames:
npm install clsx
Example:
import clsx from 'clsx';

const Alert = ({ type, message }) => {
  const alertClass = clsx('p-4 rounded', {
    'bg-red-500 text-white': type === 'error',
    'bg-green-500 text-white': type === 'success',
  });

  return <div className={alertClass}>{message}</div>;
};
Tip 3: Customize Tailwind Config for Your Brand
Add custom colors, fonts, or spacing in the tailwind.config.js file to save time:
theme: {
  extend: {
    colors: {
      brand: {
        DEFAULT: '#1DA1F2',
        dark: '#1A91DA',
      },
    },
  },
},
Tip 4: Reusable Styled Components
Create reusable components with Tailwind utilities:
const Button = ({ label }) => (
  <button className="px-4 py-2 bg-brand text-white rounded hover:bg-brand-dark">
    {label}
  </button>
);
Tricks to Supercharge Your Development
Trick 1: Responsive Design Made Easy
Tailwind’s responsive classes make adaptive layouts simple.
Example:
<div className="grid grid-cols-1 md:grid-cols-2 lg:grid-cols-4 gap-4">
  <div className="p-4 bg-gray-200">Box 1</div>
  <div className="p-4 bg-gray-300">Box 2</div>
  <div className="p-4 bg-gray-400">Box 3</div>
  <div className="p-4 bg-gray-500">Box 4</div>
</div>;
Trick 2: Add Animations
Tailwind has built-in classes for transitions and transformations.
Example:
<button className="transform transition-transform duration-300 hover:scale-110">
  Hover Me
</button>
Trick 3: Dark Mode Support
Enable dark mode by adding darkMode: 'class' in your config file. Then, use the dark prefix in your class names:
<div className="bg-white dark:bg-gray-800">
  <h1 className="text-black dark:text-white">Dark Mode Example</h1>
</div>
Using Tailwind CSS in React Native
While Tailwind CSS is primarily built for web development, you can use its utility-first styling approach in React Native apps with libraries like tailwind-react-native-classnames or nativewind. These libraries bring Tailwind-like syntax to React Native, making it easier to style your mobile apps.
Getting Started with Tailwind in React Native
Step 1: Install Dependencies
Install the required library for Tailwind support:
npm install tailwind-react-native-classnamesOr, for NativeWind:
npm install nativewindStep 2: Create a Tailwind Config File
For nativewind, initialize the Tailwind configuration:
npx tailwindcss initConfigure the tailwind.config.js to include customizations for React Native.
Step 3: Usage in Components
Example using tailwind-react-native-classnames:
import React from 'react';
import { View, Text, StyleSheet } from 'react-native';
import tw from 'tailwind-react-native-classnames';

const App = () => {
  return (
    <View style={tw`flex-1 justify-center items-center bg-blue-500`}>
      <Text style={tw`text-white text-lg`}>Hello, React Native with Tailwind!</Text>
    </View>
  );
};

export default App;
Tips for Using Tailwind in React Native
- Debugging Classes: Use console.log to verify your applied Tailwind styles.
- Custom Styles: Combine Tailwind classes with custom styles for more flexibility.
- NativeWind Benefits: With nativewind, you get better performance and auto-completion.
Example using nativewind:
import React from 'react';
import { View, Text } from 'react-native';
import { TailwindProvider } from 'nativewind';

const App = () => {
  return (
    <TailwindProvider>
      <View className="flex-1 justify-center items-center bg-blue-500">
        <Text className="text-white text-lg">Hello, NativeWind!</Text>
      </View>
    </TailwindProvider>
  );
};

export default App;
Using Tailwind-like utilities in React Native speeds up development and ensures consistency between your web and mobile apps. Give it a try! 🚀
Conclusion
React and Tailwind CSS together are a powerhouse for building modern, responsive web applications. With Tailwind’s utility classes and React’s component-based structure, you can build faster, cleaner, and more maintainable UIs.
Pro Tip: Bookmark Tailwind’s documentation for quick access to utility class references.
Now, it’s your turn to create stunning UIs. Happy coding! 🎉
 WhatsApp
 Call Us
 Mail Us