


CI/CD Pipeline in React Native From Setup to Deployment


The Challenge of Manual Builds in React Native
Building and releasing a React Native app involves multiple steps beyond writing code. Each update requires generating builds for Android and iOS, resolving dependencies, and preparing the app for testing or release. Without a defined React Native CI/CD pipeline, this process becomes inconsistent and difficult to manage.
Android builds rely on Gradle configurations and local environment setup. iOS builds require Xcode, provisioning profiles, and code signing. Even minor changes can require repeating the same steps before a usable build is available.
Manual workflows introduce delays at the team level. Builds are often created in different environments, which leads to inconsistencies.
Sharing builds with testers becomes a separate task, slowing down feedback cycles and release timelines. In a typical React Native deployment pipeline, this creates a gap between development and validation.
The Accelerate State of DevOps Report shows that high-performing teams deploy code up to 208 times more frequently and recover from failures 24 times faster than low-performing teams, outcomes closely associated with automated build and release processes.
A CI/CD pipeline in React Native addresses these limitations by standardizing how code is built, tested, and delivered. The pipeline defines a fixed sequence of steps that runs on every code change, reducing manual effort and ensuring consistent builds across environments.
CI/CD Pipeline in React Native Stages and Workflow
A CI/CD pipeline in React Native is structured as a controlled workflow where each stage governs how code moves from integration to delivery. Rather than treating builds and releases as separate activities, the pipeline defines a unified system that manages them end-to-end.
Since a React Native stack combines JavaScript logic with platform-specific native components, the pipeline must account for both layers throughout the process.
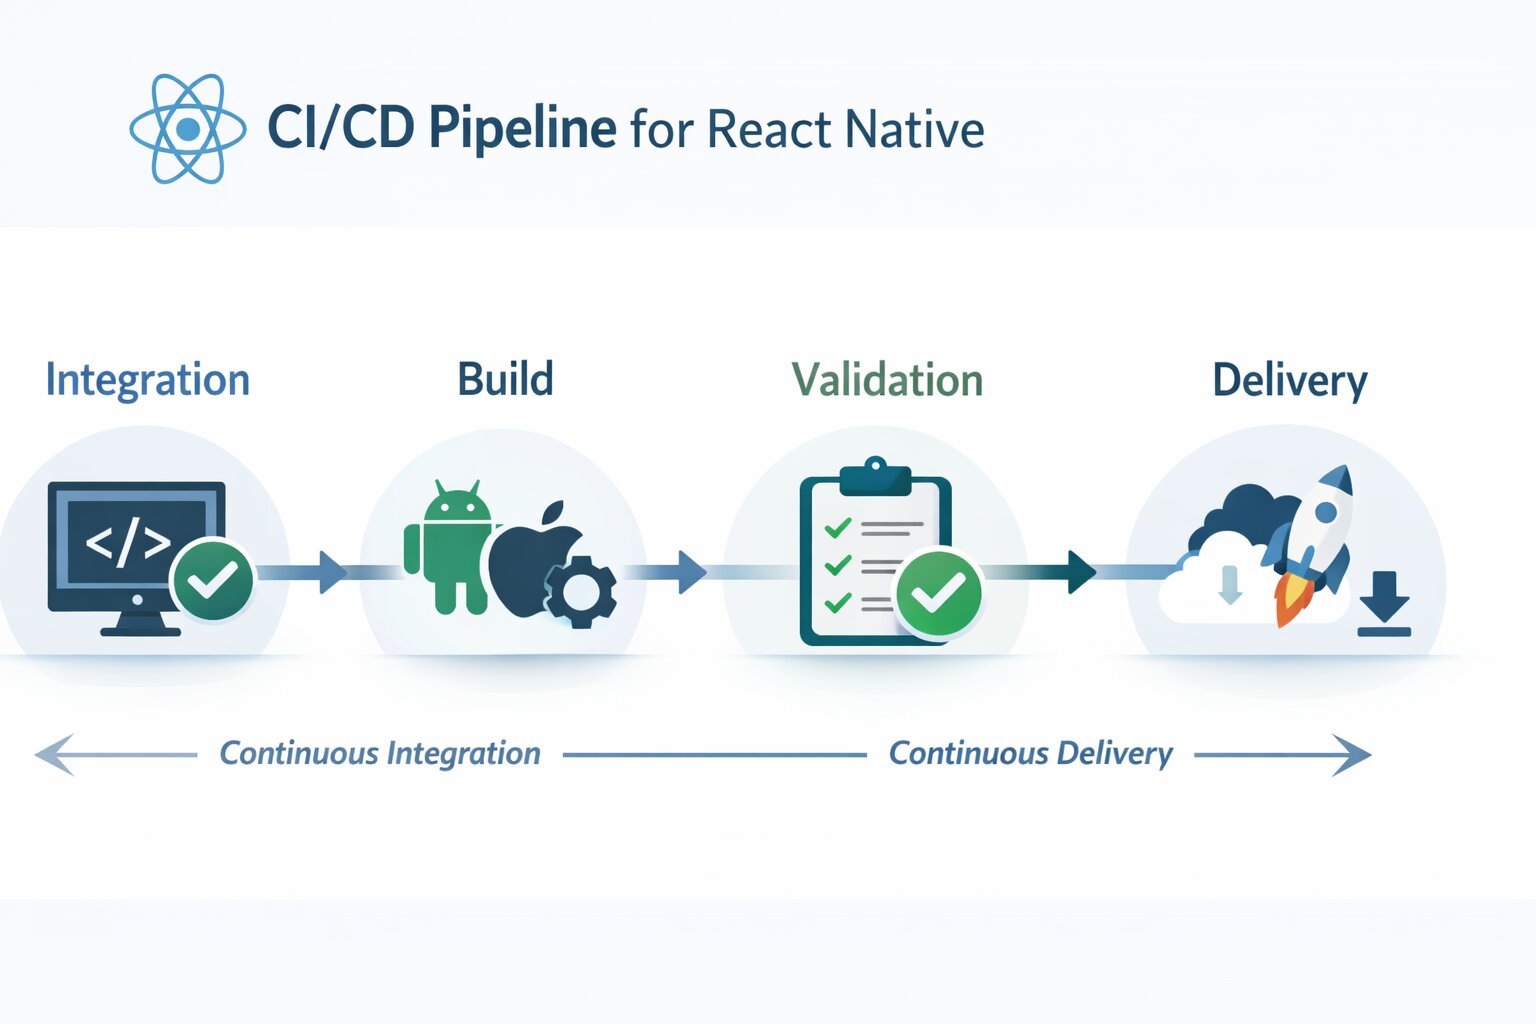
At its core, a CI/CD pipeline for React Native is organized into four functional stages:
Integration
Code is committed to a shared repository, triggering the pipeline and establishing a single source of truth. Code changes are merged into a shared repository, triggering the pipeline. This stage ensures that all updates are consolidated and version-controlled before any build or validation begins.
Build
The pipeline compiles the application into platform-specific artifacts. For React Native, this includes generating Android packages (APK/AAB) and iOS builds (IPA) using native build systems such as Gradle and Xcode in a clean and consistent environment rather than relying on local setups.
Validation
Automated checks run against the build to confirm that it is usable, ensuring early issue detection and reflecting the core DevOps principles behind automated validation. This includes verifying dependencies, ensuring the build completes successfully, and identifying issues early before distribution.
Delivery
Once validated, the build is prepared for distribution. This may involve uploading artifacts to testing platforms or preparing them for release through the app stores.
Within this workflow, continuous integration and delivery are embedded across stages. Integration and validation form the continuous integration layer, where code changes are merged and verified. Build and delivery extend this into continuous delivery, where validated code is packaged and made ready for release.
These stages operate sequentially, with each stage depending on the output of the previous one.
In a React Native pipeline, Android and iOS processes are coordinated within the same workflow, Gradle-based builds for Android and Xcode-driven processes for iOS, ensuring consistency across platforms.
This structure defines a stable React Native deployment pipeline, where builds are generated, verified, and delivered through a predictable and repeatable process.
How to Set Up a CI/CD Pipeline in React Native
Setting up a CI/CD pipeline in React Native involves defining a workflow that automatically validates code, builds the application for Android and iOS, and prepares it for distribution. This workflow runs on every code change and ensures that builds are generated in a consistent, reproducible environment.
Before setting up the pipeline, ensure the project is ready for automated execution. The repository should be version-controlled, dependencies should install reliably, and both Android and iOS builds should work locally. Any instability at this stage will surface during pipeline execution.
Step 1: Define when the pipeline should run
Start by deciding what triggers your pipeline. In most cases, it should run on pushes and pull requests to key branches.
This ensures that every change is automatically processed through the CI/CD pipeline for React Native, without relying on manual builds.
on:
  push:
    branches: [main, develop]
  pull_request:
    branches: [main]
Step 2: Create the workflow file
The pipeline is defined inside a workflow file (for example: .github/workflows/ci.yml). This file controls how the pipeline runs, what environments are used, and how jobs are executed.
At this stage, define a base structure with a runner and initial steps:
jobs:
  setup:
    runs-on: ubuntu-latest
    steps:
      - uses: actions/checkout@v3
      - run: npm ci
Using a clean environment avoids inconsistencies caused by local setups, which are a common source of CI/CD issues.
Step 3: Add validation (lint and tests)
Before building the app, validate the codebase. This prevents broken code from reaching later stages.
test:
  runs-on: ubuntu-latest
  steps:
    - uses: actions/checkout@v3
    - run: npm ci
    - run: npm run lint
    - run: npm test
Most pipeline failures at this stage are related to dependency issues or environment mismatches rather than code errors.
Step 4: Configure Android and iOS builds
This is where mobile pipelines become more complex, because Android and iOS require different environments and configurations.
build-android:
  needs: test
  runs-on: ubuntu-latest
  steps:
    - run: cd android && ./gradlew bundleRelease

build-ios:
  needs: test
  runs-on: macos-latest
  steps:
    - run: cd ios && xcodebuild -workspace App.xcworkspace
Android builds are generally straightforward with Gradle, but issues can arise from SDK or dependency mismatches.
iOS builds are more sensitive. They require macOS runners, compatible Xcode versions, and properly installed dependencies such as CocoaPods.
Mismatches between local and CI environments, especially in Pod versions or Xcode configurations, are one of the most common causes of build failures in React Native pipelines.
Step 5: Add environment variables and secrets
Environment-specific configuration is handled through variables and secure secrets.
env:
  API_URL: ${{ secrets.API_URL }}
Sensitive data such as API keys or tokens should be stored as secrets and injected at runtime. Misconfigured environment variables are a common cause of runtime failures, even when builds succeed.
Step 6: Configure code signing for release builds
Code signing is required to generate installable builds and is one of the most error-prone parts of the setup.
- Android requires a keystore and signing credentials
- iOS requires certificates and provisioning profiles
echo "$ANDROID_KEYSTORE_BASE64" | base64 --decode > android/app/release.keystoreFailures at this stage usually happen due to expired certificates, incorrect credentials, or mismatched provisioning profiles. Properly managing signing assets within the pipeline is essential for reliable releases.
Step 7: Store artifacts and prepare for delivery
Once builds are complete, the pipeline generates artifacts such as APK, AAB, or IPA files.
- name: Upload build artifact
  uses: actions/upload-artifact@v3
  with:
    name: app-build
    path: build/output/
These artifacts can be used for testing, QA distribution, or release as part of the React Native deployment pipeline. Without proper artifact handling, builds cannot be easily shared or deployed.
In most setups, these artifacts are either shared with QA teams or distributed through platforms such as internal testing tools, TestFlight for iOS, or Play Console for Android. This step ensures that builds generated by the pipeline can be tested or released without additional manual handling.
Step 8: Understand the final execution flow
Once configured, the pipeline follows a consistent sequence:
- Code change triggers the workflow
- Validation runs (lint and tests)
- Android and iOS builds are generated
- Artifacts are stored or prepared for release
More advanced setups may include caching dependencies or running jobs in parallel to improve speed, but the core pipeline remains centered on this flow.
CI/CD Pipeline Flow in React Native After a Code Push
Once a CI/CD pipeline in React Native is configured, every code push triggers a defined workflow that processes the change from validation to build and delivery. The pipeline runs automatically, ensuring that each update follows a consistent execution path without manual intervention.
Pipeline Trigger
When code is pushed to the repository, the remote branch is updated, and the CI/CD system detects the change. This triggers the CI/CD workflow automatically.
In most setups, the pipeline also runs on pull requests, allowing teams to validate changes before merging them into the main branch. This ensures that every update entering the codebase has already passed through the pipeline.
Validation Stage
The pipeline begins with validation. Dependencies are installed, and checks such as linting and automated tests are executed to verify the stability of the codebase.
If validation fails, the pipeline stops immediately and reports the issue. Most failures at this stage are caused by dependency mismatches or configuration inconsistencies rather than logic errors.
By stopping early, the pipeline prevents unnecessary build execution and reduces downstream failures, helping surface issues within React Native components before they impact later stages.
Build Stage (Android and iOS)
Once validation succeeds, the pipeline moves to build execution. Separate jobs generate Android and iOS builds.
Android builds run through Gradle in a Linux environment, while iOS builds require macOS with Xcode and properly installed dependencies. iOS builds are generally more sensitive to environment differences, which is why failures at this stage are more common in a React Native pipeline.
Configuration Injection
As the build process runs, environment variables and secrets are injected into the pipeline. This ensures that the application is built with the correct configuration for the target environment.
Issues at this stage are often not visible during build time but appear later during testing or usage, especially when environment variables are missing or incorrectly set.
Artifact Generation
After successful builds, the pipeline produces artifacts such as APK, AAB, or IPA files. These represent the compiled application outputs.
These artifacts are stored and made available for the next stage, ensuring that builds can be accessed without rerunning the pipeline.
Distribution and Delivery
Once artifacts are ready, they are shared with QA teams or distributed through testing and release platforms. Tools like Fastlane are often used to automate this process.
This stage ensures that builds move forward from development into testing or release without requiring manual handling, where teams run load testing with Artillery to understand how the application behaves under concurrent usage before release.
Pipeline Visibility
Throughout the process, the CI/CD system provides visibility into each stage of execution. Teams can track whether validation passed, builds succeeded, or failures occurred.
This feedback loop allows issues to be identified quickly and helps maintain consistency across releases.
End-to-End Flow
In practice, every code push follows a consistent sequence:
- The pipeline is triggered automatically
- Validation checks confirm code stability
- Android and iOS builds are generated
- Artifacts are created and prepared for distribution
This structured flow ensures that the CI/CD pipeline in React Native processes every change reliably, reducing variability between builds and environments.
React Native Build Process Inside a CI/CD Pipeline
Within a CI/CD pipeline in React Native, the build stage is where the application is compiled into platform-specific outputs. This step converts the codebase into installable formats for Android and iOS and runs in a clean, reproducible environment defined by the pipeline.
Dependency setup and environment preparation
Before the build begins, the pipeline installs project dependencies. This includes JavaScript dependencies through package managers, along with platform-specific tools required for compilation.
For Android, this involves Gradle and the Android SDK. For iOS, dependencies such as CocoaPods must be installed and aligned with the project configuration. Inconsistent dependency versions or missing packages are one of the most common reasons builds fail in CI environments.
Android and iOS build differences
Although both platforms are built from the same React Native codebase, their build processes differ significantly:
Android builds are generally easier to stabilize in CI environments. iOS builds, on the other hand, require tighter control over environment configuration and are more prone to failures related to signing and dependency setup.
Build execution and configuration
During execution, the pipeline compiles the application based on the defined build configuration. This includes selecting the appropriate environment (development, staging, or production) and applying environment variables.
Misconfiguration at this stage can result in builds that complete successfully but behave incorrectly during testing or release. Ensuring consistency between environments is critical for reliable output.
Output generation and handoff
Once the build completes, the pipeline generates platform-specific outputs:
- Android: APK or AAB
- iOS: IPA
These outputs are passed to the next stage of the React Native deployment pipeline, where they are stored, tested, or prepared for distribution.
Tools Used in React Native CI/CD Pipelines
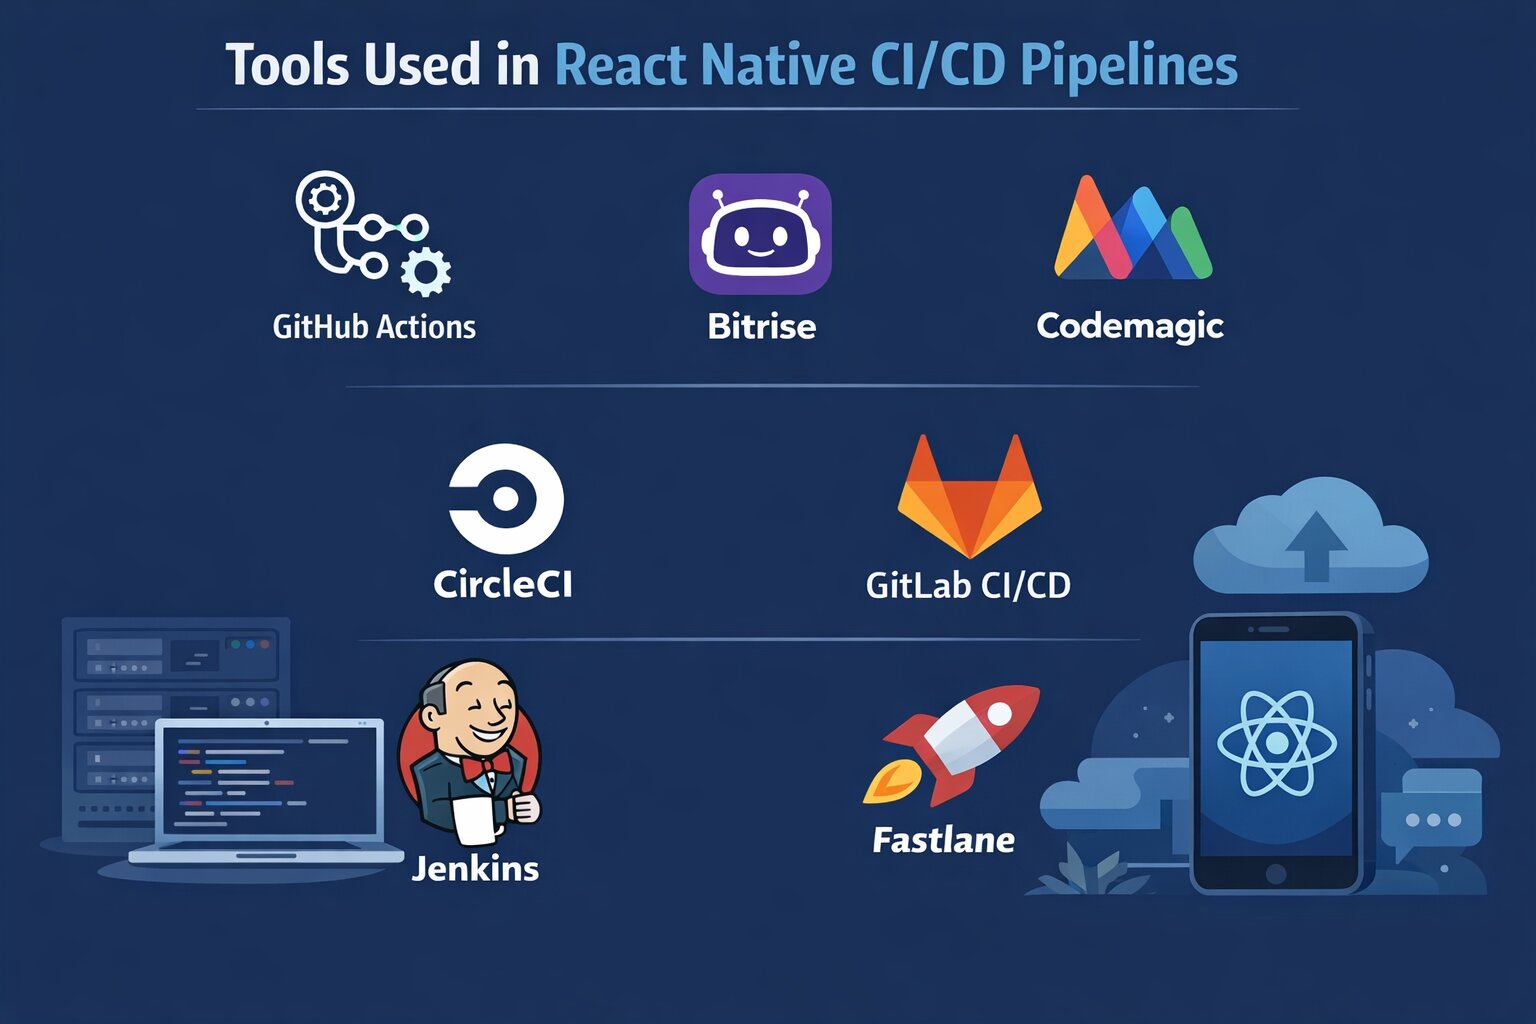
A CI/CD pipeline in React Native can be implemented using different tools depending on how workflows are managed, how much control is required, and how complex the build process is. While the underlying pipeline structure remains the same, the choice of tool affects setup effort, flexibility, and long-term maintenance.
React Native CI/CD Tools Comparison
The tools listed above differ in how they handle configuration, platform support, and workflow control. Below is the outline of where each tool fits and how it is typically used in a React Native CI/CD setup.
GitHub Actions
GitHub Actions is widely used for repositories hosted on GitHub. It allows workflows to be defined directly within the codebase, making pipeline configuration version-controlled and easy to maintain.
It provides flexibility in defining jobs, supports both Android and iOS builds, and integrates well with existing development workflows. It is suited for teams that want control over their CI/CD workflow without introducing additional platforms.
Bitrise
Bitrise is built specifically for mobile applications and offers pre-configured workflows for React Native projects. It simplifies setup for Android and iOS builds and reduces the effort required to manage dependencies and environments.
It is particularly effective for handling iOS provisioning and mobile-specific build requirements, making it a strong choice for teams focused on mobile development.
Codemagic
Codemagic provides a streamlined setup for mobile CI/CD pipelines with minimal configuration. It offers built-in support for React Native and automates many steps involved in dependency management and build execution.
It is suitable for teams looking for faster setup and reduced configuration complexity.
CircleCI
CircleCI is a widely used CI/CD platform that supports flexible pipeline configuration and parallel execution. It integrates with GitHub and other repositories and is often used in projects that require faster build execution and scalable workflows.
It is a good fit for teams that want performance optimization and flexibility without managing their own infrastructure.
GitLab CI/CD
GitLab CI/CD is integrated within GitLab and provides end-to-end pipeline management, from code repository to deployment. It supports complex workflows and is commonly used in enterprise environments.
It is suited for teams already using GitLab and requiring a tightly integrated development and deployment pipeline.
Jenkins
Jenkins is a self-hosted automation server that allows complete customization of CI/CD workflows. It supports a wide range of plugins and integrations, making it highly flexible.
However, it requires manual setup, maintenance, and infrastructure management, making it more suitable for teams with specific customization needs or existing infrastructure.
Fastlane
Fastlane is an automation tool used in mobile app development to handle repetitive tasks involved in building, testing, and releasing apps especially for iOS and Android.
Instead of manually running multiple commands for building and deployment, Fastlane lets you define these steps once and execute them automatically.
Each of these tools supports the same pipeline structure but differs in how workflows are configured and managed. The choice usually depends on where your code is hosted and how much control your team needs over the setup. Selecting a tool that fits your workflow reduces setup complexity and keeps the pipeline easier to maintain.
Conclusion
A CI/CD pipeline in React Native is not a single step or tool but a structured system that connects integration, build, validation, and delivery into one continuous workflow. Once this structure is defined, every code change follows the same controlled path, reducing variability between environments and builds.
Most of the complexity lies in how different parts of the pipeline interact. Platform-specific requirements, environment configuration, and dependency management all influence how reliably the pipeline runs, especially during the build and delivery stages.
The setup defines the foundation, but the consistency of execution is what makes the pipeline effective. A well-configured pipeline ensures that validation, build generation, and distribution happen in a predictable sequence without requiring manual coordination.
As projects scale, this consistency becomes more important than the tools themselves. The focus should remain on maintaining a stable workflow where changes move through the pipeline reliably, rather than on adding more layers of configuration.
 WhatsApp
 Call Us
 Mail Us