A tutorial to work with Python virtual environments
Introduction
In this tutorial, we’ll walk through the process of setting up and working with Python virtual environments. Virtual environments are a crucial tool for any Python developer, whether you're just starting or working on multiple projects.
What is a Python Virtual Environment?

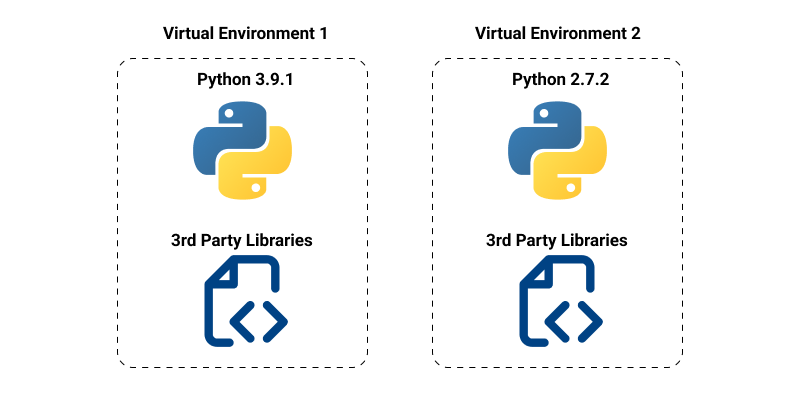
A Python virtual environment is like a sandbox where you can install and manage packages for each project separately. It keeps your main Python installation clean and allows each project to have its own version of Python packages.
Why is it Useful?
Let’s say you are working on two Python projects. One project might use an old version of a package like Django 3.0, while another uses Django 4.0. Without virtual environments, installing both packages globally could cause conflicts and mess up your projects. With virtual environments, you can keep these projects isolated, with their own dependencies.
Prerequisites
Before you start working with Python virtual environments, make sure you have the following:
Python installed: You’ll need Python installed on your machine. If you don’t have it, download it from the official Python website.
You can check if Python is installed by running the following command in your terminal or command prompt:
python --versionOr, for some systems, you might need to use:
python3 --versionPip installed: Pip is Python’s package manager. It usually comes with Python, but you can verify it by running:
pip --versionIf everything is good, we can move on to setting up your virtual environment!
Setting Up a Virtual Environment

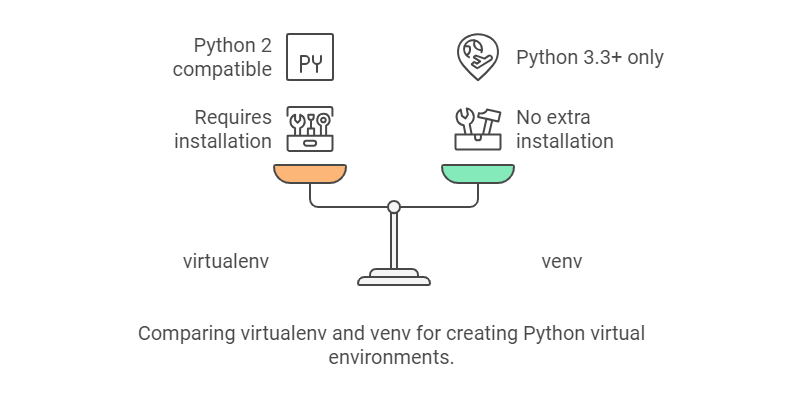
There are two common ways to create virtual environments in Python: using virtualenv (works with both Python 2 and Python 3) or the built-in venv module (Python 3.3+).
Step 1: Installing virtualenv (For Python 2)
If you are using Python 3.3 or higher, you don’t need to install anything extra, because the venv module is already included.
For Python 2 or if you prefer using virtualenv, install it by running:
pip install virtualenvThis command installs virtualenv globally, allowing you to create virtual environments anywhere.
Step 2: Creating a Virtual Environment
Now, navigate to the folder where you want to create the virtual environment. Open your terminal (or command prompt on Windows), and run:
For Python 3+ (using venv):
python -m venv myenvFor Python 2 (using virtualenv):
virtualenv myenvThis creates a new directory named myenv. Inside this folder, Python and all the necessary files to run the virtual environment are stored.
Activating the Virtual Environment
Once the virtual environment is created, you need to activate it before you can start using it. Activation differs depending on your operating system.
On Windows:
To activate the environment, run the following command:
myenv\Scripts\activateIf this doesn't work, make sure you're in the correct folder where myenv is located.
On Mac/Linux:
On a Mac or Linux system, the command to activate the environment is:
source myenv/bin/activateAfter activating the environment, your terminal prompt should change. It should look something like this:
(myenv) $This indicates that the virtual environment is active, and any Python commands you run will now apply within this environment.
Managing Python Packages inside the Virtual Environment
Now that your virtual environment is active, you can install and manage Python packages as needed for your project. All installed packages will remain within the virtual environment and won’t affect your global Python setup.
Step 1: Installing Packages
To install a package, use pip inside the virtual environment. For example, to install the requests package, run:
pip install requestsPip will download and install the package, making it available only in this virtual environment.
Step 2: Checking Installed Packages
You can list all the packages installed in your virtual environment by running:
pip listThis command will show you a list of all packages and their versions that are currently installed.
Step 3: Freezing the Environment
If you want to share your project with others or deploy it, you’ll need to create a file that lists all the packages and their versions. This is done with the freeze command:
pip freeze > requirements.txtThis command creates a requirements.txt file, which contains all the dependencies your project needs.
To install the same packages in another environment, someone can use this file by running:
pip install -r requirements.txtDeactivating the Virtual Environment
When you’re done working with the virtual environment, you can deactivate it by simply running:
deactivateOnce deactivated, your terminal prompt will return to its normal state, and any Python commands you run will use the global Python environment again.
Deleting the Virtual Environment
If you no longer need the virtual environment, you can delete it by removing the myenv folder. This doesn’t affect your project files, just the virtual environment.
On Mac/Linux, run:
rm -rf myenvOn Windows, use:
rd /s /q myenvThis will completely remove the virtual environment from your system.
Customizing a Virtual Environment

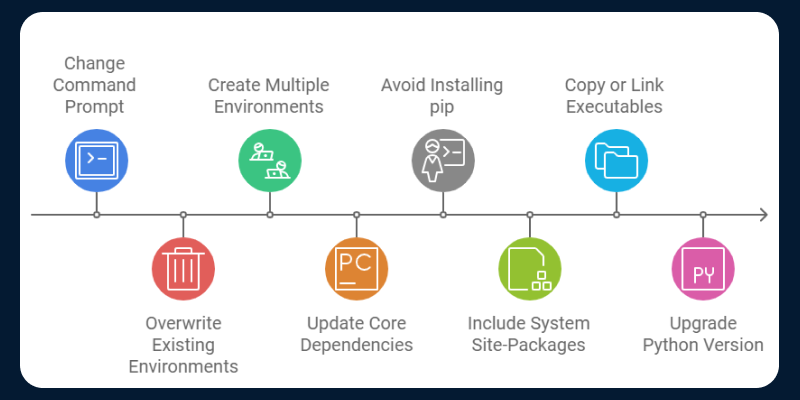
Virtual environments come with customization options that can enhance your development workflow. Here’s how you can tailor a virtual environment to better suit your project needs:
1. Change the Command Prompt
When you activate a virtual environment, your terminal prompt will show the environment’s name by default (e.g., (myenv)). You can customize the name to make it more descriptive or easier to recognize.
To change it, edit the activate script inside the virtual environment's folder (myenv/bin/activate on Mac/Linux or myenv\Scripts\activate on Windows), and modify the line that sets the prompt.
2. Overwrite Existing Environments
If you create a virtual environment with the same name as an existing one, the old environment won’t be automatically replaced. To overwrite it, manually delete the existing folder before creating the new environment.
3. Create Multiple Virtual Environments at Once
You can use tools like virtualenvwrapper to manage multiple virtual environments easily. It provides a set of commands to create, delete, and switch between environments without having to navigate into each environment’s folder.
Install virtualenvwrapper with:
pip install virtualenvwrapper4. Update the Core Dependencies
The venv or virtualenv the command comes with some core packages (like pip and setuptools). These packages can sometimes be outdated when you first create an environment. You can update them by running:
pip install --upgrade pip setuptools5. Avoid Installing pip
If for some reason you don’t want to use pip in your virtual environment (for example, in very minimal setups), you can create a virtual environment without it by using the --without-pip option:
python -m venv --without-pip myenv6. Include the System Site-Packages
By default, virtual environments isolate packages, but you might sometimes need to include the globally installed packages from your system Python. You can enable access to them when creating a virtual environment by adding the --system-site-packages flag:
python -m venv --system-site-packages myenv7. Copy or Link Your Executables
When creating virtual environments, Python executables can be either copied or symlinked (linked) to save space. On some systems, the venv module uses symlinks by default, while virtualenv might copy them. You can force one behavior or the other by passing flags like --copies (to copy) or --symlinks (to link).
8. Upgrade Your Python to Match the System Python
If your system Python gets upgraded after you’ve already created a virtual environment, the environment will still use the old Python version. To upgrade the environment’s Python to match the system version, you can recreate the virtual environment or manually upgrade it by replacing the Python binary inside the environment.
Managing Your Virtual Environments

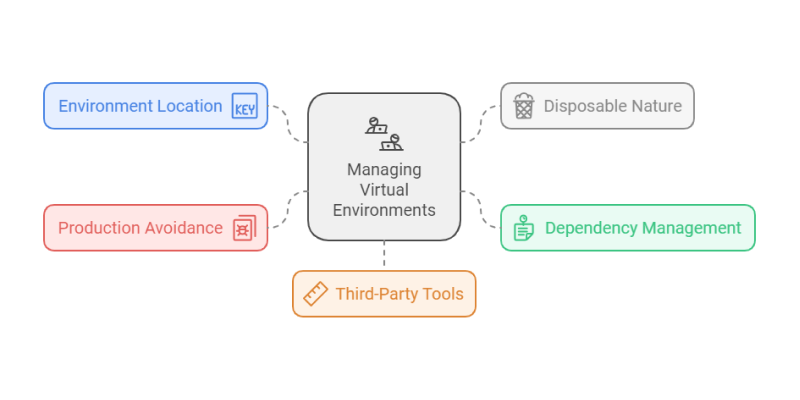
Managing virtual environments can become tricky if you’re working on multiple projects or need to deploy them. Here are some tips for managing them effectively:
1. Decide Where to Create Your Environment Folders
It’s good practice to create each virtual environment inside your project folder, but you can also keep all your environments in one place using tools like virtualenvwrapper. This centralizes your environments for easier management.
2. Treat Them as Disposables
Virtual environments should be considered temporary. If they get corrupted or too cluttered, it's often easier to delete and recreate them than to fix them. Use requirements.txt or Pipfile to ensure you can easily recreate the environment.
3. Pin Your Dependencies
To avoid issues when packages update, it’s important to “pin” your dependencies. This means specifying exact package versions in your requirements.txt file so that others (or even you later) can recreate the same environment with no surprises.
Here’s an example of what the file could look like:
Django==3.0.8
requests==2.24.0
4. Avoid Virtual Environments in Production
In production environments, it's better to use system-level tools like Docker or virtual machines rather than relying on virtual environments. This provides better isolation and avoids potential issues with deployment.
5. Use Third-Party Tools
There are several third-party tools that make managing virtual environments easier:
virtualenvwrapper: A wrapper aroundvirtualenvthat simplifies creating, deleting, and managing environments.pipenv: Combines Pipfile andvirtualenvto manage dependencies and environments in one tool.
Conclusion
Python virtual environments are a simple yet essential tool for any Python developer. They help keep your projects clean, organized, and independent from one another. Whether you’re working on personal projects or collaborating with others, using virtual environments will save you a lot of headaches when managing package versions and dependencies.
By following this guide, you’ve learned how to create, activate, manage, and delete Python virtual environments. Now you can start using them in your projects to keep your work more organized and conflict-free.
